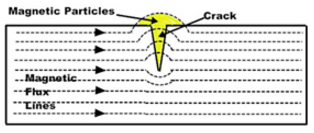


Liquid Penetrant Testing (PT)

Pic1 : Using Penetrant Test
The basic principle of liquid penetrant testing is
Steps to use of penetrant
1.Clean the surface of the material

Pic 2 : Use Cleaner/ Removal
Cleaned the surface of test beforehand to dirt , paint , oil , or plump did not result in an indication that are not very relevant or false .A method of cleansing can use a cleaning fluid ( cleaner / remover ) , for cleansing redusi an alkali , or steam degreasing .The ultimate goal of this step is a surface that is cleanly in which each defect visible and formed to the surface , dry , and free from contamination.

Pic 3 : Use Penetrant Liquid

Pic 4 : Clean up the Penetrant
After used Penetrant Liquid, please to Clean up the Penetrant on workpiece, the clean up can use Cloat Former, the cleaner/remover can to spray at cloat former, and than clean up the work piece with cloat former.
4. Use Developer Liquid

Pic 5 : Use Developer Liquid
After penetrant have been in clean in the surface of a workpiece use cleaner , and next use developers on a workpiece , wait 5-1 minutes . If there is an indication defect welds , so defect welds will appear in a workpiece
Developers interesting penetrant from defect come out to the surface to form a visible indication , is commonly known as blood - out .Any area blood - out can indicating the location of the , orientation and a kind of the possibility of a flaw on a surface. Interpret the results and characterization flaws in an indication that discoveries could be require various training and / or experience size an indication is not actual size from defect.
5. Inspection

Pic 6 : Inspection
Inspector will use visible light in intensity adequate ( 100 feet -- wax or 1100 lux typical ) to dye penetrant look.Ultraviolet ( uv-a ) of radiation intensity adequate ( 1,000 mikro-watt per centimeters public square, along with low level light ambient ( less than 2 foot-candle ) for examination penetrant fluorescent.Inspection the surface test to do after 10 to 30 minutes development, based on the type of products.
6. Post Cleaning

Pic 7 : Post Cleaning
If already convinced with the indications defect welds that appears , then immediately do cleaning on a workpiece .To maintain a workpiece the lifetime .